How Tree Matrix Works
Start Saving Trees in Just a Few Easy Steps
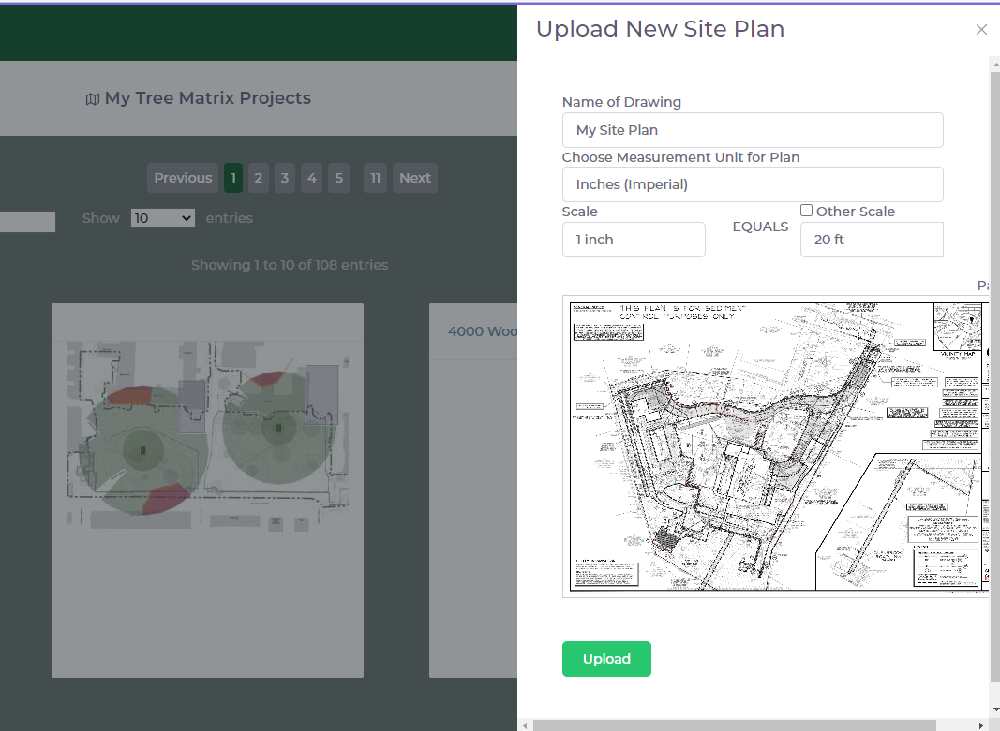
Step 1: Upload Site Plan
Upload PDF site plan and choose plan scale
Predict tree survival from root disruption with unparalleled accuracy. Our Predictive Analytics Engine will overlay your development plan and instantly compute survival scores for each disrupted tree. Options for using metric scales are also available. Users can also adjust the plan scale during their work, instead of closing the plan and starting over.
Step 2: Add Existing Structures
Add Buildings and Engineered Roads
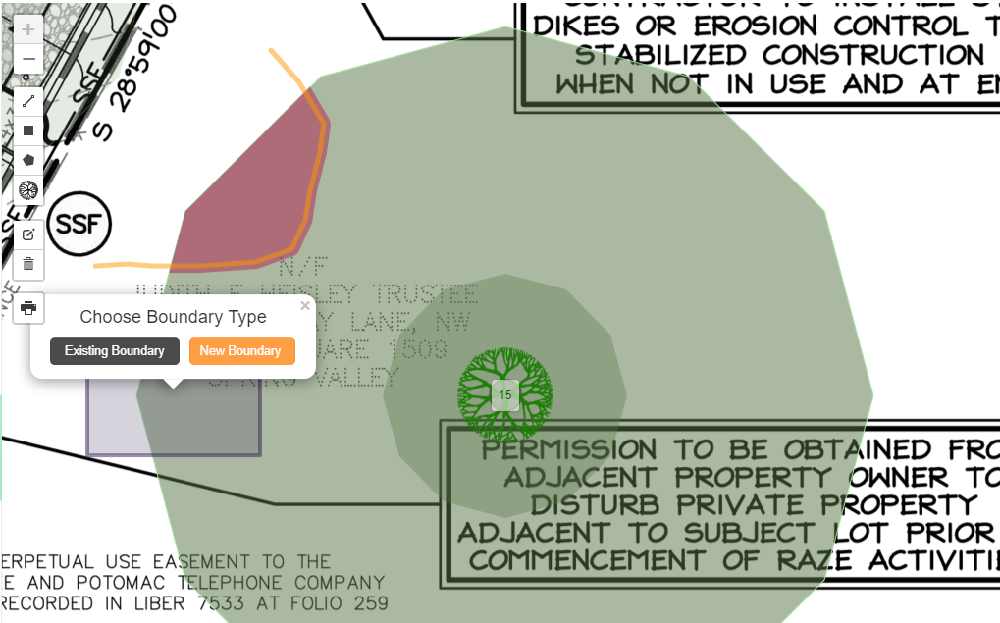
Identify boundaries that will redirect root growth. Boundaries are outlined by the user with the line tool, polygon tool or box tool from the vertical selection left of the site plan. Once outlined, label these boundaries "Existing Boundary." Typical boundaries that can redirect root growth include buildings and walls on deep footings, and engineered roads. These are roads with Proctor density 95%, or greater. Asphalt surfaces or dirt roads are typically not "hard" barriers to root growth. They would be considered "soft' barriers in that they may discourage root growth, but not deflect it.
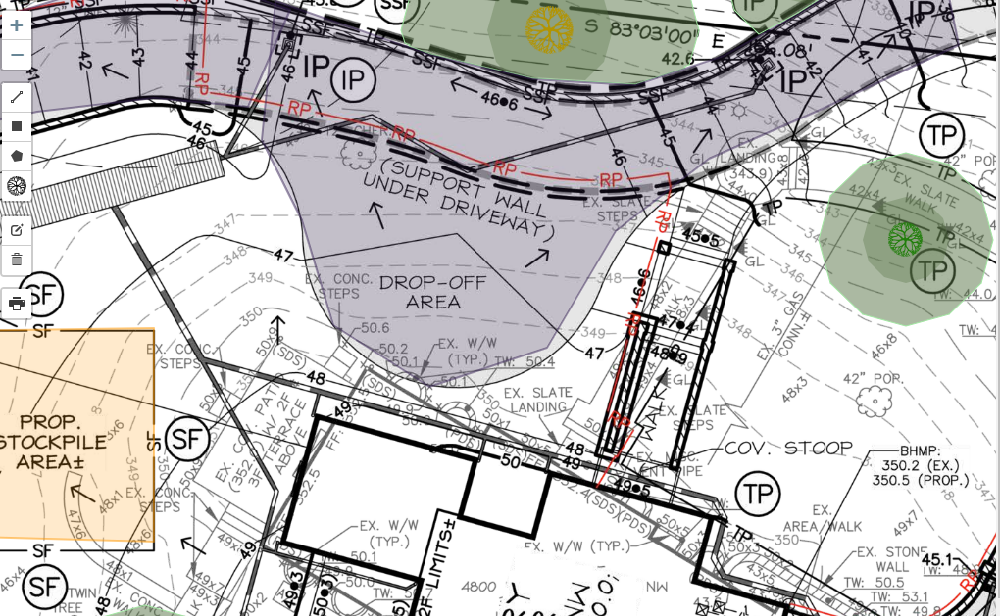
Step 3: Add Trees
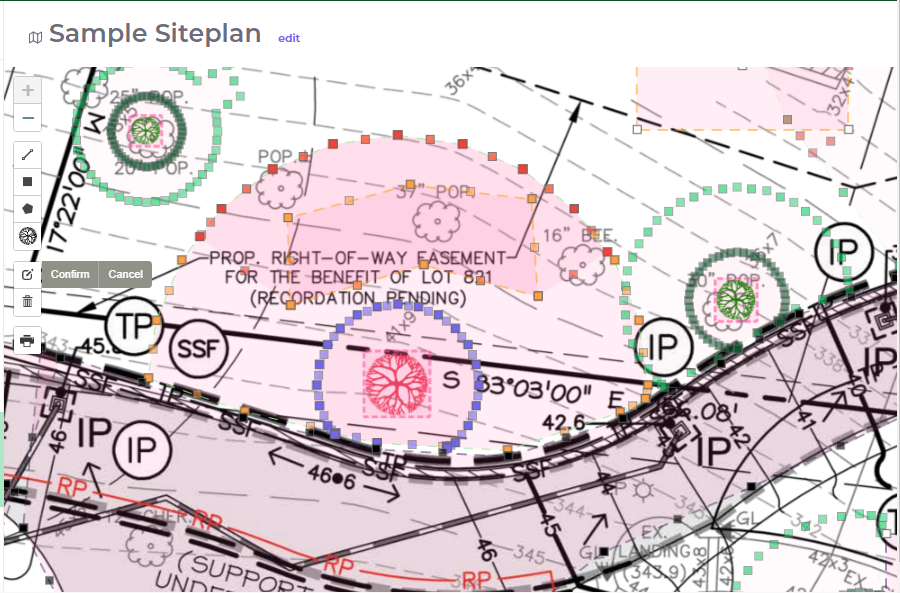
Place tree markers on plan and specify tree details
Drag-drop tree markers on site plan, and enter tree type, trunk diameter, tree condition, and season of impact. Tree Matrix calculates predicted root zone area and visually plots the structural and critical root systems as an overlay for each tree added. Structural root zones are shown as a smaller dark green circle. Cutting these large structural roots risks whole tree failure and significant decline in tree vigor.
Step 4: Add New Development Plan
Add plan for new structures and development
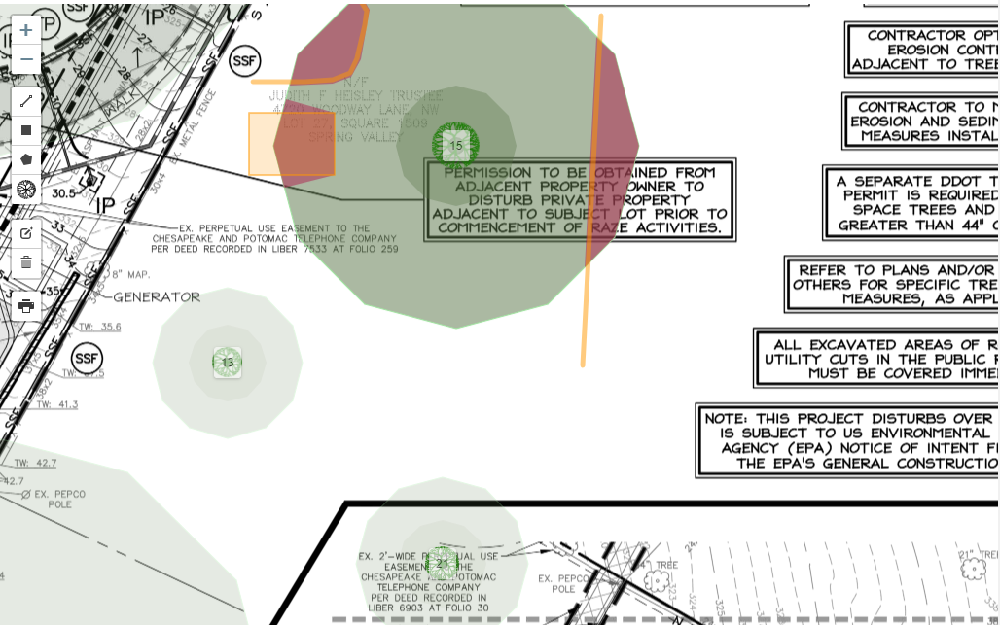
Any structure or root pruning line can be added with the same line, polygon and box tool. In this case, label these boundaries as "New Boundary." After placing new structures on your plan, Tree Matrix will show the endangered root system in red and adjust the survival score. The user will then determine the number of "sides Impacted" parameter on any trees whose root zone is impacted. The sides are usually root pruning lines, or other types of excavation or impacts. Tree survival rates decline if two or more of the four sides of the root zone are damaged. You can change the properties on each tree to reflect the lateral sides of the root zone which are blocked or destroyed by new structures.
Step 5: Add Utility Alignment and Grading
Add any structures that impact roots
Tree Matrix makes it easy for you to add any barriers such as utility lines or other disruptions to the root systems and gauge their impact. It is important to update the sides impacted as these impacts are added.
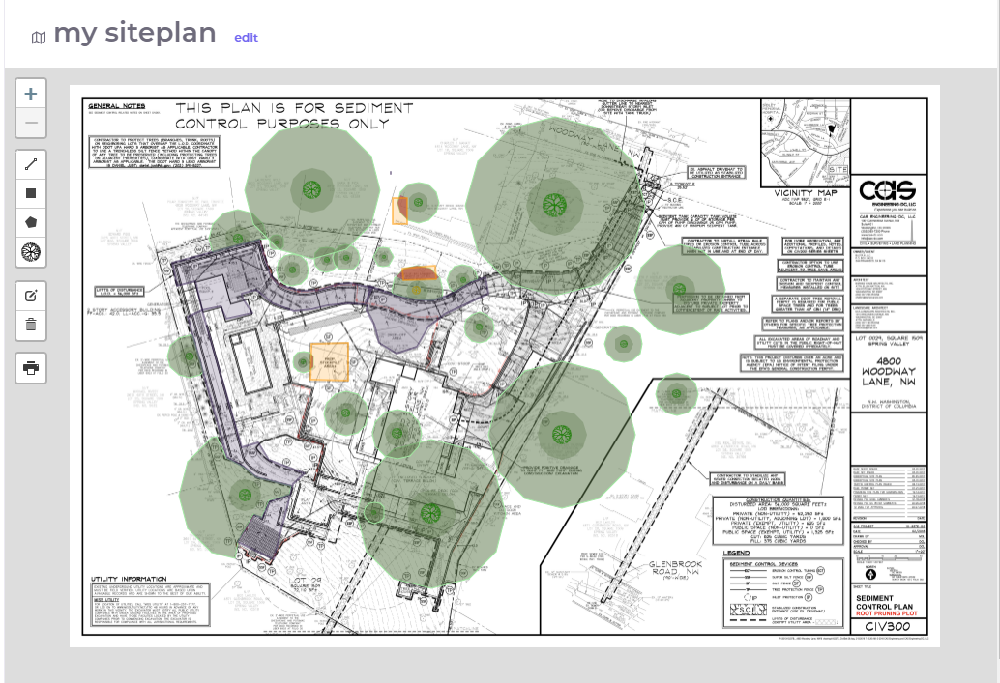
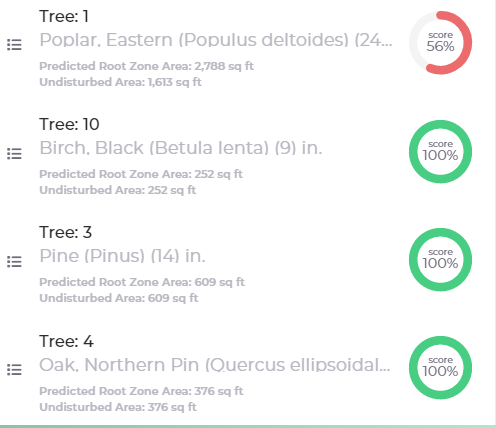
Step 6: Assess Survival Scores
Instant tree survival score calculations
The Predictive Analytics Engine computes the adjusted Tree Survival Score as a percentage (0-100%). Survival gauges for each tree display the score, and three survival zone colors help to highlight tree survivability. Green (survival predicted), yellow (survival at risk), and red (survival unlikely).

Step 7: Adjust Plan For Survivability
Easily adjust proposed boundaries
The Edit mode allows for easy adjustments to proposed structural boundaries, which can limit the root zone disruption. Tree Matrix immediately calculates an adjusted survival score. The "Isolate Tree" feature allows for easier manipulation of root zone limits. The user can also save multiple versions of the same plan to demonstrate different impacts based on structure changes.
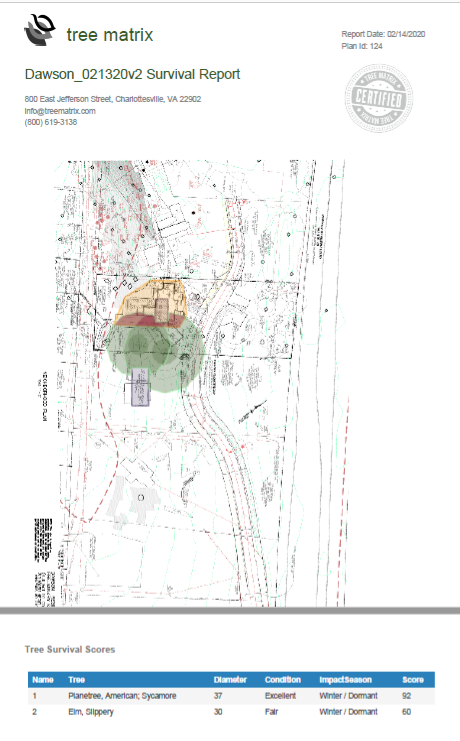
Step 8: Print Survivability Report
Print and share your Certified Survival Report.
Your tree survivability scores are backed by our peer-reviewed algorithm and over 35 years of arboristry experience.